
Makers Workshop
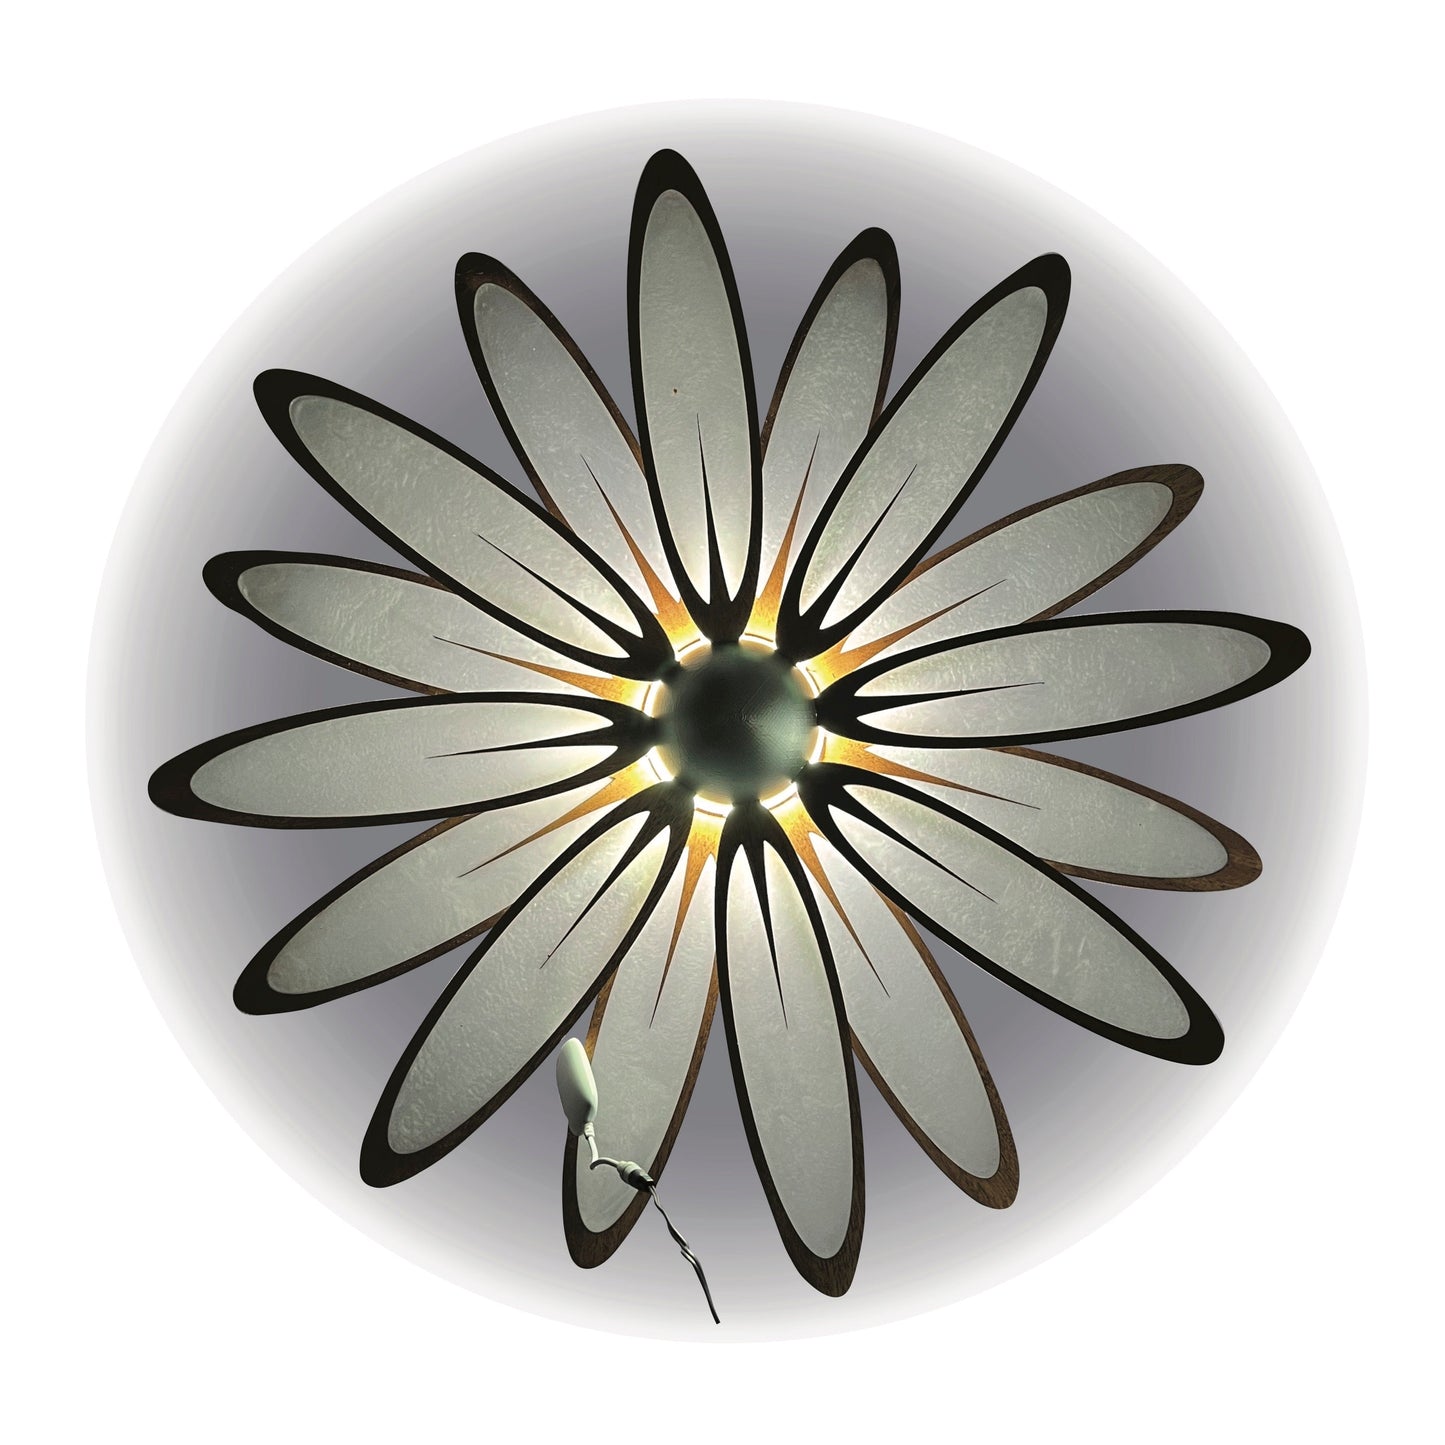
Giant Glowing Laser Cut Daisy
Giant Glowing Laser Cut Daisy
Couldn't load pickup availability
This giant daisy laser cut pattern is versatile and offers a range of finished looks. It can be made with, or without resin inlaid petals, and with and without the addition of lighting to the center. It would look incredible with acrylic petals, solid wood petals, spray painted plywood petals... the possibilities are endless and It's up to you!
-Brooke
Suggested Materials:
3D Printer Filament of choice, I used and Recommend PLA but use what you love most
4 12"x20" sheets of 1/8" thick laser safe material
Superglue
Spray Paint for Daisy Center (optional)
10mm wide LED Strip Lights (optional)
Additional Materials if Doing Resin Inlay:
Resin
Pigment to color resin
80 grit and 220 grit sanding disks
Painter's Tape
Finish of choice
Instructions:
- Start 3D Printing the Daisy center in your filament of choice.
- Laser Cut all 16 Daisy Petals. You should have a set of 8 with a longer tab, and a set of 8 with a shorter tab.
- If you're adding the resin inlay apply a layer of tape to each daisy petal to make a pocket to hold the resin in until it cures. Paint a thin layer of clear resin over petal and the tape and allow to cure. Mix in pigment of choice, and complete the rest of the resin pour filling to the brim of each Petal. Allow to cure, and then un-peel tape. Sand both sides of each petal up to a 220 grit and apply finish of your choice.
- If you want to prime and paint your 3D printed daisy center, now is the time to do so.
- Wind LED strip lights into the groves on the 3D print and make sure they are working properly before hot gluing or super gluing into place. All of the associated electronics should fit into the back of the 3D print.
- Slip each petal into its slot. The petals with the longer grooves go on the back layer, and the petals with the shorter grooves angle slightly upwards and make the top layer of petals.
- Turn on the light, and enjoy!
Share
-
Project Notes
-
Suggested Materials